"No fear!" ~Julia Child

Saturday, April 8, 2017

Pork Tenderloin with Herbed Mustard Potatoes or Idle Hands are the Devil's Something or Other....

Butterballs!
It is I (or we!) the triumphant!  Returning to you from an abnormally long hiatus.  Turns out this adulting thing can kind of take over your life and make you forget things like your hopes and dreams.

It has come to my attention that there is a lady (I assume a lady???) who has (I shit you not) adopted a cat, named it Butters (maybe, at least that's this facsimile's stage name), and purchased the domain name for Cooking with Butters.  It's not me.  I haven't the slightest how someone who apparently has so much web-based knowledge (her page is admittedly nice looking, though unattended for the last year or so...) could not be creative enough to come up with her own concept, but, alas- there are now two "Cooking with Butters" out in the universe.  To be fair, I myself have not been as attentive to this page as I could have been over the last two years or so, so I suppose I should be flattered that my concept was apparently so appealing as to be stolen by someone else.

I'm working hard to get back into things that have given me a lot of joy over the years, and learning to balance my work life (which in itself obviously gives me lots and lots of joy!) with my personal life and my numerous hobbies that have frankly become more and more neglected as I come home more and more exhausted.  I'm starting with my blog, and my endeavors into food in general!

As I take this time to re-explore my own interests, it has become abundantly clear that I am passionate about meat (*crickets chirp*).  Between my salmon smoking (stay tuned as we build a new smoker this summer- I've officially run two charcoal grills right smack into the ground.  On a related note, if anyone has access to a two drawer file cabinet in need of a home, hit me up!), and my somewhat time-consuming and abrasive habit of re-butchering anything that I purchase at the grocery store, I'm just truly interested in carnage in general.

Thankfully, grilling season is finally upon us!  We've had an unforgivably long and disgusting winter during which it was so horribly cold and wet, we hardly left the house at all, and the BBQ, at a whopping 50 feet from the back door, could've just as easily been in Siberia, so it's been a minute since we've really just toasted the crap out of anything.  The last week it's finally warmed up enough to venture one furry (yep) leg out from the comfort of my love seat, so I took the opportunity on Tuesday to make this delightful pork tenderloin.

Speaking of re-butchering, these $4 pork tenderloins from Walmart (yes, you get what you pay for) are often somewhat of a crapshoot.  This one was absolutely perfect!  Just the right amount of fat cap, two pounds of perfect tenderloin.  You'll need:

2 lb. pork tenderloin
Italian seasoning
Smoked paprika
Salt and cracked black pepper
Olive oil

For the herbed potatoes:
2 cans of whole new potatoes
2 tablespoons of Italian seasoning
Olive oil
Salt and cracked black pepper
1 and 1/2 tablespoons whole grain mustard
Grillin' skillet (or similar thingy)

Start by coating the tenderloin in the olive oil, then liberally rub with the Italian seasoning, salt, pepper and paprika (light on the paprika).  Heat your grill to 450 degrees, clean grates and rub with olive oil.  Sear each side of the tenderloin, then turn heat down to 325, and take off of direct heat, leave for 25 minutes, turning halfway through, or until meat has reached an internal temp of 145 degrees.

For the potatoes:  Drain liquid from cans, put potatoes in bowl, coat liberally with seasoning and olive oil (reserve mustard for later).  Toss until they are coated evenly.  Place in grill pan over high heat, stir occasionally until they develop a brown crust on both sides.  Remove from heat, place potatoes in bowl, add mustard to bowl, and toss until the potatoes are coated.

I don't have a finished product photo- we gobbled it up way too fast, but here is a prep pic, complete with a glass of rose, my grilling beverage of choice as of late.


In closing, it's good to be back, my lovelies!  Stay tuned for all sorts of delightful culinary hijinx as the cat takes back the internet!

XOXO

Thursday, August 6, 2015

Canned Tomatoes! Or, How to Save Your Tomato Babies from Flea Beetles.

My friends!
The cat is back...again!  I apologize for my long absence!  No excuses, I've just been doing a lot of things like this:
 And this:

And of course, a whole bunch of working with awesome kids and making music!

So fire up your range, uncork your Cabernet, and let's get to work!

Have you heard of flea beetles?


They are like they sound.  Teeny, tiny, voracious little monsters that devour every tomato leaf in their path (and apparently the occasional kale plant).  Matt and I had noticed a couple of weeks ago that our tomato leaves had roughly one million miniscule holes in them, and thusly were turning brown and falling off.  We thought we had taken care of the issue with some organic blight spray, which didn't work even a little; enter the flea beetles.

Most of you are familiar with my bug issue.  If not: I have a bug issue.  After a few years of being the primary gardener in our household, it's improved slightly, but my general knee jerk reaction to anything with more than four legs is to turn it to putty.  Spare me your lecture of "Blah, blah, blah good bugs versus bad bugs, don't kill the Daddy long legs, blah."  Don't care.  If it's in my hair or on my body it will be dispatched of forth with.

Flea beetles are so little.  Like, so little.  You can't even see them unless you're looking.  Unless, of course, you've made your sweatshirt into a kangaroo pouch and filled it with roughly 30 roma tomatoes, and as you innocently dump them into the sink to be washed, a conservative estimate of 12 billion little black vermin swarm OUT OF YOUR CLOTHING and take over your ENTIRE kitchen counter.  Seriously, no one will ever make me feel bad about smashing ANY bug, ever again. 

The internet and I conspired to kill these hungry little jerks together.  After maybe a solid five minutes of searching, we determined that there IS NO EXISTING PESTICIDE organic or otherwise that will effectively eliminate all signs of flea beetles.  None.  Someone suggested on a forum of equally grossed out gardeners that they don't like chili oil.  Some had found success with garlic.  Not wanting to be perceived as not taking this seriously, I promptly put ten garden chilis, 4 cloves of garlic, water and oil in the food processor.  I smelled it, and about fell over.  For real guys, it still burns when I blow my nose.  It might forever, who's to say?  I figured that applying this directly to the fruit could result in some seriously caustic tomatoes, so I poured it all over the base of 10 tomato plants.  They're not dead yet (the plants or the bugs), so here's to hoping, right?  Also if you come over to my house, maybe don't play in any of my dirt, because it might melt your fingers off of your body.

But I digress... This is just a really long way of telling you that I've been canning all of my tomatoes as soon as they even turn pink on the vine.  The bugs don't seem to care much for the actual tomato fruit itself, but I figure they're bound to run out of leaves sometime, and it could turn ugly.

I have a lot of fond memories of canning with my Mom as a kid.  We made countless jars of pickles and tomatoes.  Occasionally, I'll still get to can with her when I come home for a weekend in the fall.  This is my first year attempting tomatoes on my own, and it's unbelievably satisfying to have those fresh jars all lined up on the counter, so much so that you leave them there for several weeks to admire until your husband suggests that they be given a new home in the pantry.


As far as I'm concerned, the jury is still out as to whether or not canning actually saves you any money, especially for the first couple of years, unless you have a seriously productive garden, or a plentiful stock pile of mason jars.  After your first couple of seasons, all you should really have to purchase are the fresh lids, but until then it's more of a feeling of accomplishment with the added bonus of having preservative free veggies until next year.  While canning, I personally like to envision myself as Xena, warrior farm-woman of the prairie, who's muscular thighs propel her through her fields of plump, ripe tomatoes, while her arms of steel place them into her home spun basket, made from the bones of her enemies.  But that's just me.  My personal experience has been fairly cost effective as I inherited a water bath canner from my Mom's basement, and I don't can it unless I grew it... paying by the pound to put up tomatoes is really only saving you the unnecessary ingredients that they incorporate into canned food from the store.

This is a supply-heavy process.  I haven't really come across any ways to MacGyver canning... the whole risk of botulism thing is kind of a turn off.  You will need:

-A steam, or immersion (water bath-which is what I use) canner WITH A RACK!  If you place the cans directly on the bottom of the pot on the burner, you risk them cracking.
-pint jars (for this particular recipe) with new, never before used lids, and rings.
-A silicone padded jar lifter, or heavy duty oven mitts to lift out your entire rack.
-A small sauce pan for heating the lids.
-A larger stock pot for boiling the skin off the tomatoes.
-A slotted spoon.
-A large colander.

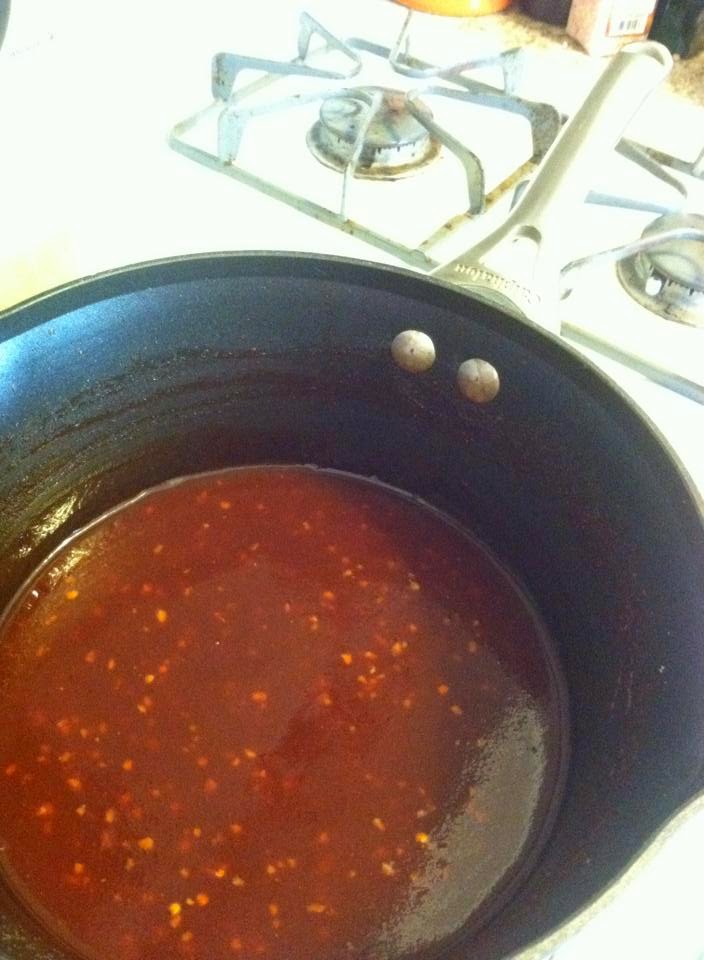
Your stove will look like this (minus the salsa because this is an old picture...):

Also, your house will be REALLY hot.  Pick a coolish day to can.

Ingredients:
-As many tomatoes as you want to can.  It takes about six-eight roma tomatoes to fill a pint jar.
-Lemon juice (store bought is fine)
-Salt

Fill your water bath canner approximately 3/4s of the way full.  Put your jars (without lids) in the rack in the pot to sterilize them.  Bring water to boil on high heat- allow to boil until you're ready to use the jars.  This will take approximately forever, so while you wait:  Put the lids with some water in the small sauce pan, bring to a boil, reduce to simmer, allow to simmer until you are ready to use.  Bring water to a boil in the large stock pot.

While you wait for all that water to boil, core and score your tomatoes with an "X" on the bottom.  This is my Mom's favorite part.  She likes to pretend they're the people that frustrate her, which is a totally healthy way to cope with stress.  Fill your sink with cold water for later.  Once your stock pot is boiling, put the cored tomatoes in the water for 30 seconds to 1 minute, until you see the skin just start to crack.  It's helpful to do this in smaller batches (no more than 10 tomatoes at a time).  Take the tomatoes out of the hot water, and put them in the cold.  Repeat until all of your tomatoes are in the cold water.  Remove the skins (they should slide off easily, if not, you can throw them back in the hot water for a second).  Place the tomatoes in the colander.

Obviously those haven't been cored yet, I'm just showing off my Instagram skillz...

When your tomatoes are ready, and your water is boiling in the canner, you can carefully pull the sterilized mason jars out of the canner.  Place on a kitchen towel on the counter near your tomatoes.

For each jar:
-Fill half way with tomatoes (mush into jar).
-For pint jars, add 1 tbsp of lemon juice, and 1 tsp salt.
-Fill the rest of the way, leaving about a half an inch of head room.
-Wipe the rim of the jar, make sure it's really clean or it might not seal!
-Remove lids from simmering water, screw down rings until just barely finger tight.
-Using jar lifter, place jars back in the hot water bath, make sure the lids are covered by about 2 inches of water.


-Cover, wait for water to return to a boil (I know, this takes forever, remember, you are Xena!  Canning war goddess, or God!  To the best of my knowledge, Xena is a gender neutral name!)
-Once water is boiling, keep covered, set timer for 15 minutes.
-After 15 minutes, remove from water, set on towel to cool.
-Any unsealed jars should seal as they cool (you can tell if they're sealed by tapping the top, no sound = sealed), if you want to make double sure, you can turn the cans upside down on their lids after they've cooled for a few minutes.

(For quart jars, use 2 tbsp lemon juice, 2 tsp salt.  Process for 25 minutes instead of 15.)

Voila!  Delicious, preservative free tomatoes!  I've read that shelf life is anywhere from six months to a year, but I know people who say it's fine as long as the jar is still sealed and the contents are unchanged (color, fluid level).  Once opened, refrigerate.  You go, canning Goddess!  You are truly a vision of garden warrior success!

As always, Butterballs, thanks for reading!  Here's to a few more weeks of beautiful weather, delicious food, and time on the water (or boiling it if you're canning tomatoes...)

Best Fishes!
XOXOX


Monday, July 28, 2014

Summer Honey BBQ Baby Back Ribs, or One Girl, Two Grills

Happy Monday to all, sweet Butterballs!

After spending literally the entire weekend on the river, I am nursing an armpit sunburn with crime dramas, leftover hotdogs from yesterday's impromptu BBQ, and doing ALL the laundry.  A few of my nearest and dearest took me on my maiden floating voyage on the Clark Fork yesterday, so I can now say that my summer just got a little more "Missoula" after completing this right of passage.  For those unfamiliar with the sport of floating, you get yourself a giant inner tube (all the local gas stations start selling these at a premium around the last week of June), some box wine (or whatever floats your, ahem, tube...), slather yourself in sunscreen to the best of your ability, and take to the river in all your lazy, sundrenched glory.  Like this:


Bonus points for velcro water sandals or a permanent sunglasses outline burned into your face.  My lovely bunch of buddies strapped five tubes to the top of a Subaru sedan.  We only had to stop twice to re-secure them.  The second time we stopped, two elderly tourists from Florida demanded that we pose with our tube-laden vehicle because, "No one's going to believe this in Boca!"

 
All this weekend warrior-ing is making me somewhat of a home-body during the week.  Last week, I decided to smoke up some more salmon for next week's appetizers while my parents are here.  While I was waiting for my fish to be wrapped up, I found a gloriously inexpensive rack of baby back ribs.  This was a new adventure for me, as generally, BBQ saucy things are not my favorite.  Matt usually demands Famous Dave's for his birthday.  I steal one of his ribs, then order the catfish for myself.  I spent the next couple of hours bouncing between the indoor kitchen, my salmon on the charcoal grill, and my ribs on the gas grill.  Matt found the whole thing hilarious and photographed it for your viewing pleasure.


Most of the work in baby back ribs is in the prep work.  Mostly prepping the sauce, and removing the membrane on the inside of the rib cage.  To remove the membrane, flip the ribs over so the meaty side is on your cutting board.  Make a small slit with a sharp knife in between two of the ribs.  Time to get dirty!  Using your fingers, separate the thin layer of membrane (looks like sausage casing) from what would be the inside of the chest wall.  Make sure you get all of it; it will make the ribs much easier to cut, and chew once they are done.

For the sauce:  I have a special spot in my heart for artisanal local beer.  My seasonal favorite is Big Sky Brewery's Summer Honey.  It was the only beer we had at our wedding, so it will always have a little soft spot in my heart, and my liver.  Usually I only reserve it for drinking with a slice of lemon, but in this case, it definitely has a starring role in the sauce.

 
Ingredients:
1 and 1/2 cup ketchup
1 tablespoon minced garlic
2 tablespoons lemon juice
2 tablespoons Worcestershire sauce
1 bottle of Summer Honey (or your favorite light summer ale)
1 cup of brown sugar
1 teaspoon chili flake
3 tablespoons (or to taste) sriracha
course ground black pepper to taste, plus a little kosher salt

Add all ingredients into a medium saucepan, adding the beer last.  Set to simmer on medium high heat, whisking until all ingredients are combined, then occasionally until the sauce has darkened, and thickened considerably.  Remove from heat, put in a bowl with a grill safe brush for glazing.

Simmering Sauce


Finished Sauce

Cut your rib rack into two smaller, equal racks.  Place your ribs over medium heat, with the remaining burners on high.  Glaze each side of the racks with BBQ sauce, 15 minutes per side, turning once.  Keep the lid closed in between glazing and flipping.  Reserve a little sauce for a final, salmonella free glazing right as they're finished.  


Let stand for about five minutes to let them cool and to let the sauce set.  Slice in between each rib.  We ate them with zucchini from the garden grilled with olive oil, salt and pepper.  Serves 2.


If you'd like, you can double the sauce recipe to make more ribs, or to put in a jar in the freezer for faster prep the next time.  Just be sure to use a bigger sauce pan to contain the mess! 

As always Butterballs, it's a pleasure cooking for you.  I hope you are enjoying the middle, hottest days of summer, and that you are staying cool with the ones you love. 

Love and best fishes!
Mwah!


Wednesday, July 23, 2014

Grilled Balsamic Pork Roast! Or, under-done meat, demon neighbor children, and other things you don't want at your BBQ...

Good afternoon, dear, sweet, Butterballs!
How delightful it is to be able to have the time to write to you on more than just a every so often basis!  Thanks a bunch for reading and all the shares!  It's so awesome to know that the fat cat is reaching more than just my personal audience!

As I pen today's blog, I am being serenaded by the dulcet screams of neighbor children.  Now, one might assume that I should be concerned for the safety of said screaming neighbor children.  No.  They're fine.  They just spend all their time screaming.  All day strong, all day long.  Poor Dexter has been spending 99.9% of his time barking wildly at them from the safety of his doggy bed in front of the window since school got out in June.  They don't limit their time to wailing at the top of their lungs in my front yard.  Oh no.  They divide the rest of their time equally between standing smack in the middle of the street playing handheld video games, racing you on their bikes when you drive into the cul de sac, and picking all of our flowers and leaving them in piles on the sidewalk.  Most recently, i.e. five minutes ago, our littlest cherub walked up to the window by our front door, and started pounding on the glass in Dexter's face, as he froths at the mouth, hoping for a sweet chunk of baby meat.  Who needs birth control, amiright?  It's because of these angelic little darlings that Matt and I have mostly retired the wine porch in front of the house, in favor of the much more private, nice and quiet back porch.  There's only so many times you can be asked, "What are you eating?  Can I have some?", by a complete stranger while trying to enjoy your hastily made porch dinner until you eventually snap.  So, Matt and I decided to build a patio in the backyard, since A. We hate watering our crappy grass, and B. Our front patio was no longer safe from the sticky little fingers of death.

It started out easy enough.  Just digging a 60 square foot hole in the grass behind our garage.


Then came the trip to Lowe's.  Then the trip to Home Depot.  Then another trip to Lowe's.  Then it was 11 o'clock and I wanted that SOB finished, so I slapped all the pavers on top of the sand and called it a deck.


We had a couple days of rain, and we weren't able to use it yet.  It wasn't until Matt was outside a couple days later, and our neighbor handed us an enormous set of dirt levelers (completely well-intentioned of course...) that we realized there was an issue.  We went out in the backyard, and everything had totally shifted and fallen apart.  Then came another trip to Lowe's.  2nd time's the charm with patio building apparently, because after some serious Googling, we eventually figured out what it was supposed to look like.  Hooray!  Now we just needed some stuff to put on it to cover the remaining physical imperfections.


If you were my first graders I might ask, "What are some things you could do outside, on a patio?"  You might answer, "Read a book!", "Play with my dog!", "Spiderman!".  All of which would be excellent answers.  Except Spiderman.  The answer I'm clearly looking for is, "Drink beer and BBQ, Mrs. Raffety!"  Yes, little Billy, you know me so well!  My parents and I went in on a grill for Matt for his birthday last Sunday, and to date, I've spent more time playing with it than he has, but no one is really surprised by that are they?  So, crack open your favorite summer ale, and join me on your half-assed patio, kids, because it's time for balsamic pork roast!


Pork roast?  How will that get done on a gas grill?  Hey, you know, it doesn't.  Not unless you give it enough time at the right temperature.  So, I'm editing this a smidge so you don't have to cut yours in half to get it finished because you are hangry, and you've already eaten all of your asparagus just hot off the grill.  Not that that happened to me or anything.  I'm a professional.  *serious cook face*.

Pork roast is a great blank canvas for whatever flavor du jour you're gunning for.  It can be a lot of fun to mess around with different flavor combos.  I can't take credit for this little factoid because I know I read it somewhere else...  But!  A good formula to stick with is acid + oil + seasoning.  So in this particular instance we went with, balsamic vinegar and chardonnay + olive oil + dijon mustard, parsley, salt, pepper and chilli flake.  Buh-bam!  Marinade.  Easy-Peasy.  Apologies in advance that there are no food photos of this particular endeavor.  Just picture a cantaloupe sized piece of meat smothered in delicious.  See?  Not so hard :)

You'll need:
a 3-4 lb. pork roast (or, turkey breast, but I tend to shy away from super strong flavor combos with turkey since it's so flavorful on it's own...)
1/2 cup balsamic vinegar (cheap!  You're mixing it with what I can only assume will be equally cheap white wine after all.)
1/2 cup white wine, I used chardonnay
1/4 cup olive oil
1 tbsp. parsley
2 tbsp. dijon mustard
salt and pepper to taste
a little chili flake, 'cuz that's how we do...

Whisk all of that together (except the pork roast... which goes without saying), reserve about a third of it for glazing as you grill.  Marinate the pork roast for about an hour, flipping a couple of times.  Heat your grill to high, sear the roast on all sides.  Turn your center burners down to medium, with the roast over those, and close the grill lid.  Turn every fifteen minutes or so (adding a coat of marinade) for about an hour, or until your pork reaches an internal temperature of 160 degrees.  Cut into slices.  We ate it with grilled asparagus and potato salad.

Some other marinade combos you might enjoy:
  • White wine + olive oil + sriracha, parsley, cumin, salt and pepper
  • Lime juice + olive oil + sriracha, chili flake, garlic salt, pepper, cilantro
  • Balsamic vinegar + olive oil + basil, salt and pepper
  • White wine and lemon juice (be careful, it's a slippery slope) + olive oil + rosemary, salt and pepper
 Voila!  Stay tuned for more grill-tastic recipes!  Hope your summer is all the fun you've been hoping for.  Have a cold one for me!  As always, Butterballs, thanks for reading, lots of love and best fishes from me, Matt, Dexter, and the fat cat! 

Monday, July 14, 2014

Mama Katie's Smokin' Salmon!

Butterballs, Butterballs!  Where have you been all my life?  Apologies for my prolonged absence, but never fear! I come bearing piles of delightful recipes.  Dexter, Butters, Matt and I have been spending our days working, building patios (more on that later...), and cooking up a lot of tasty treats.  One of which, my smoked salmon, has become a family favorite, and has been affectionately named 'Mama Katie's Smokin' Salmon' by my ever-adorable husband.

Deep in the heart of darkness that was spring this year, the fur babies and I were itching for an opportunity to get outside.  We strapped on our yoga pants, hitched up our Ugg boots, and decided to try our hand at smoking fish.  "Smoking fish?", you might ask, "but why?"  Yes, you can most certainly purchase a nicely pre-smoked salmon at the grocery store, but having done a little research, a four ounce piece of smoked salmon averages $8 (or $32 a pound...), at least in the greater Missoula area.  If that doesn't convince you, just consider that this is an activity where you literally NEED to sit on your ass, drink a beer, and read a book for a minimum of 2 hours to do it successfully.  So, let's do some math: 


Butters has decided to make some home-smoked salmon.  He goes to the cat grocery store and spends $25 on a whole side of raw salmon, that will yield 8, 4 ounce pieces of smoked salmon (roughly $12.50 per lb.). Last week, Butters had a party for all of his cat friends.  Dexter served them store bought salmon at $32 per lb.  How much cat nip beer can Butters buy with the money he's saving to drink while he smokes his fish?  Do you have your answer?  A LOT of cat nip beers, that's how many.  Essentially, while this process is somewhat time consuming, it will give you the gift of  cost effective, cured meat, with the added bonus of productive leisure time.  Win, win I say.


Now, to make some fancy, hard-smoked salmon, you will need some non-edible supplies:
  • Grill- I like my charcoal one for this process.  If you decide to use a gas grill, you won't need the next two items.
  • Charcoal (about 5 lbs)
  • Lighter Fluid
  • Wood chips for smoking (I like hickory) Note:  If you use a gas grill, you will need a smoker box for your chips.
  • Large bowl
  • Strainer
  • Cookie sheet with sides
Before you get started:
You'll want to hang out with your fish to make sure that your charcoal fire stays stoked and covered in chips.  Cooking anything in a smoker has a distinct odor, so maybe don't wear your favorite dry clean only ballgown for this process.

First, you'll need to soak your wood chips.  The longer you smoke them, the less chips you'll need because they will last longer.  Fill your strainer with chips, place it in the bowl.  Fill the bowl with water.  Leave to soak for a minimum of 1 hour.

After you get you chips soaking, you'll need to prep your salmon.  One of the major pros of smoking your own salmon is that you can choose your own seasonings.  I like onion and garlic powder with cracked pepper, but I also have a Trader Joe's lemon pepper grinder I'm itching to try out.  Some people like to play with glazes (think balsamic vinegar and marmalade...), the possibilities are truly endless.  You will need to clear a flat space in your fridge to let your salmon rest.  It will lose lots of liquid, so choose a cookie sheet with sides so your fridge doesn't smell like fish for the foreseeable future. 

Edible Ingredients:
As much salmon as you'd like to smoke- I used 2 lbs. cut into 8ish pieces, leaving the skin on
1 cup kosher salt
1 cup brown sugar
1 1/2 tbsp. each cracked black pepper, onion powder, and garlic powder

Mix dry ingredients together, move a little seasoning into a different bowl as you use it, so you don't contaminate your extra seasoning with fish yuck.  Cover all pink sides of the salmon with a thick layer of seasoning.  Place each piece on a cookie sheet, covered in parchment paper.  Place in the fridge for a minimum of one hour (the longer you let the salmon set, the dryer the finish on it will be).

While you are waiting for your salmon to get dry and your chips to get wet, light your charcoal grill.  Keep the coals in a pile in the front of the grill, where they can get lots of air.  Cover in lighter fluid, and let burn until the edges have started to turn gray. 

Take your salmon out of the fridge.  There should be lots of liquid in the bottom of the cookie sheet.  Wipe each piece off with wet paper towel.  You can leave as much seasoning on the fish as you'd like, but if you leave it all it will be too salty. 


Cover your coals with about 2 handfuls of your wood chips (strain first).  Place your fish on a part of the grill with NO COALS under it, leaving a little space between each piece.  Put the lid down on the grill, and open the vents halfway.  The longer you smoke it the dryer it will be.  2 hours, adding new chips whenever the old ones have completely turned black will make a flaky, moist fish.  Your fish should be a deep red color when you take it off the grill.  Keep it on foil until it cools. 


Serving Suggestions!

Now that you have all of this delicious fish, how do you eat it?  Here are a few of my favorites!
  • With a soft cheese (plain goat cheese, or Boursin) on crackers, or a crusty baguette.
  • In a sandwich!  Goat cheese, bean sprouts, cucumbers, and red onion on ciabatta.
  • On a salad!  Baby greens with sesame sticks, mandarin orange slices, cucumber and a balsamic vinaigrette.
  • By itself!  Great with olives, cheeses, and other cured meats like sopressata.
  • On a Bagel!  Cream cheese, red onion, and capers, oh my!
  • On toasts!  Goat cheese, dijon mustard and capers!  
  • In your pasta!  I like it with pesto (see Pork and Pesto for Your Mama! Entry for a pesto recipe!!)
  • With quinoa!  Boil the quinoa with garlic and shallots in chicken stock.
  • Show it off at parties!  Friends love friends who smoke their own fish!  There's a certain Ron Swanson-esque, je ne sais quoi about a buddy who makes artisanal meats.  
  • Smoked salmon dip!  1 lb cream cheese, a little milk, some worcestshire sauce, dill and dijon mustard blended with 4 ounces of your salmon.
Voila!  You can keep your fish in the fridge for a couple of weeks, or the freezer for up to a year.  See?  Wasn't that worth the wait?  Now, put on your bikini, crack open a cold one, and head out to the yard for some quality fish smoking time!

Love and best fishes,
Katie


Wednesday, February 5, 2014

-41 with the Wind Chill Means Hot and Sour Soup, Y'all!!!

Butterballs, butterballs,
The forecast today calls for a major wind chill warning, and I quote, "Long term exposure can result in hypothermia, frost bite, or DEATH."  Cheery, no?  That last part is my favorite.  What that means for us is no time outside, and my tolerance for getting in and out of the car is at an all time low.  THAT means, I had to get gas for carpool, so that used up my "getting out of the car" quotient for the day, so that means, Refrigerator Roulette!  Here's a rough summary of Matt and my week night thought process:

Matt: The new Bon Appetit came yesterday!

Katie: Oooooooo, what's on the cover?

Matt:  Fancy chicken and dumplings!  With mushrooms!

Katie:  Oohhhhh, we have mushrooms!

Matt:  We could make this!

Katie:  Okay, I'll thaw some chicken!

Matt:......reading

Katie:  *Googling hot and sour soup because the cover photo looked more like hot and sour soup than chicken and dumplings*

Matt:  This takes two and a half hours and you have to own a pressure cooker.  Also what's a morel?

Katie:  That's okay, I'm already making hot and sour soup!  Also, I'm not thawing chicken, because I will probably eat all the left over pizza while our shitty microwave takes ten hours to thaw all the chicken. 

So the long and the short of it is that we made hot and sour soup with left over breakfast sausage. 

Hot and sour soup is something that you only buy the morning after one too many 7 and 7's in a Chinese restaurant (you can infer the kind of Chinese restaurant by the fact that this story takes place in the morning...), and you only have $15 in your bank account (i.e. college).  It is full of meat, egg, mushrooms, and grease, and can usually be purchased in near-gallon-drum quantities for a little less than dirt cheap.  While this does not aptly describe our circumstances this evening, since we haven't been 21 now for several years (read: I drink a glass of wine, make some sort of creation for dinner, and fall asleep watching Dr. Quinn in bed at 9 p.m. nearly every day), and we have to get up in the morning for silly things like work, and feeding the fur babies, and drinking coffee, this turned out particularly well.   I also didn't use any of the recipes I found, since most of them required things like tofu, so here's how to make my faux hot and sour soup!

To make my week night savior Hot and Sour Soup you will need:
 1/2 pound shitake mushrooms sliced
6 mini bell peppers, for color, sliced in little rings
1 head broccoli, chopped 
1 small onion halved and sliced
1 tablespoon minced garlic
3 green onions, chopped
a few tablespoons olive oil
3/4 lb. browned sausage (or any kind of protein, chicken or pork would also be great, Matt usually doesn't define a dish as dinner unless it contains animal)
4 eggs, lightly whisked
2 cans (4 cups) Chicken stock
2 cups water
1/2 cup white wine
5 tbsp corn starch
3 tbsp sriracha
1 tsp chili flakes, or to taste
1/4 cup white vinegar
3 tbsp. soy sauce (I always use low sodium)


Brown the onion, garlic, broccoli, mushrooms and peppers in olive oil in a large stock pot.  Add in the sausage, stock, water, wine, sriracha, chili flake, soy sauce, and vinegar.  Bring to a boil, add in the corn starch, simmer for 15 minutes to thicken.  Bring the heat down to medium, drizzle the egg into the hot soup, stir lightly.  Stir in the green onion.  Serve with egg rolls (which I did not, in fact, have.  If it were payday, I would serve this with egg rolls...).  Although the picture might suggest otherwise, you should not share this with the furry children.  Unless you are fond of cleaning spicy, spicy carpet stains. 

Enjoy, because it's mighty cold out there, friends.  Remember, don't prolongedly expose yourself, because of that whole "death" thing.  Really it makes far more sense to make yourself some soup and drink a glass of whatever.  As always, love and best fishes!

Friday, January 31, 2014

Aye Carumba! Protein explosion Mexi-Casserole!

Howdy y'all, Butterballs!

Holy page views, Batman!  Thanks for the love!  You inspire me to continue, and share the love that is the Raffety family kitchen!  I am also inspired by the fact that Matt is insisting on cooking this evening (twist my arm...), and that I stocked up on a WHOLE bunch of Oak Leaf Cabernet at Walmart the other day.  Fun fact: Did you know that the Two Buck (or closer to 3 bucks anymore...) Chuck people make Oak Leaf ($3.77, but still an acceptable level of cheap for the professionals among us...)?  This is mostly a "fun" fact because Charles Shaw is a completely legit, weeknight wine, so buying 8-10 bottles of Oak Leaf on payday is 100% socially acceptable, and maybe you can pass as a connoisseur having a cost-effective party instead of just tired and cheap and probably drinking this in the company of your cat.  At our local Walmart, they've also started wrapping each individual bottle of wine in a wine shaped paper bag.  For those of us that need to haul 10 bottles out to where we parked our car for carpool going on 12 hours ago, this is clearly a very considerate gesture. 

In Missoula at the moment, it is capital W Winter, with all caps SNOW.  Matt and I are the owners of the world's most useless snow shovel.  It is so useless, that if it snows, I am far more likely to choose to use our broom (formerly known as house broom), to SWEEP AWAY all 8 inches of snow than I am to use this shovel.  Matt recently informed me that "it works way better" if you flip it over, and shovel upside down.  Our neighbors already think that we are completely inept 12 year olds (in fact most 12 year olds are probably intelligent enough to abandon a shovel this useless...), so making a show of shoveling upside down would only further cement this perception into their minds.  Long story short, I moved all of our snow off of our hard outdoor surfaces today using an O'Cedar floor broom, then cursed and swore at our shovel, all while still in my dress from taking our 4th graders to the orchestra today (obviously this seems counter-intuitive... don't worry, I changed my shoes).

After you've already had your fill of shoulder toning shoveling, and your dog's belly is two inches below the surface of the snow, making a good walk somewhat of a moot point, what you really need is more protein than a professional body builder consumes in a week.  I have a history of intolerance for Mexican-themed pasta... I can't rationalize it per se, maybe it's my love of pasta combined with mozzarella, who knows?  I scan Pinterest and see a plethora of recipes for lasagna rolls smothered in enchilada sauce and think... well, no thanks.  You could use orzo, or another small pasta as a substitute for the quinoa, because... variety is the spice of life?  Sure.  I just always feel like quinoa is rice's exotic Spanish cousin, and casserole is pasta's cozy Italian bestie, so naturally the two should meet.  Lord knows I love me some CHEESY, CHEEESSSSYYYY casserole.

You will need:
1 and 3/4 to 2 cups uncooked quinoa (you can boil this in equal parts water til all the water absorbs)
2 chicken breasts, seasoned with taco seasoning (another weeknight shortcut, you can sub your own blend, cumin, garlic and salt are most important), cooked through and cubed
1 medium can tomatoes, chilies and onions mixed
1 medium onion, coarsely chopped and browned in olive oil
1 can black beans, drained
1 cup (or more, YOLO, right?  P.S. This is the correct use of YOLO, or "You Only Live Once", as opposed to, "Drank 12 Four Locos and lit my porch on fire today... made s'mores, YOLOOOO!!!) Mexican blend cheese
Parley
Taco Seasoning
Pepper
Chili Flakes (to taste, 'mo spicey, 'mo betta in my book...)
One swirl of Sriracha (because why not?) all around the pan (of course that's a measurement, who asked you?)

Once you've boiled the quinoa and cooked the chicken and onion, you can mix up all the ingredients, minus the cheese in a large pan.  Heat until most of the tomato juice has reduced.  Spoon into medium, round baking dish, cover with cheese, and bake at 375 degrees for 30 minutes, or until cheese starts to bubble and brown slightly.  Serve with guacamole, see http://cookingwithbutters.blogspot.com/2011/10/hooray-for-fiber.html for my recipe!  Matt also likes a dollop of sour cream.

I forgot to take a picture, but the thing about pictures of casserole is that they just look like dishes with cheese on top, so here's a picture of Dexter wrapped in Matt's apron:
As always, love and best fishes!  Mwah!